Monday, December 16, 2013

Homemade Dulce De Leche


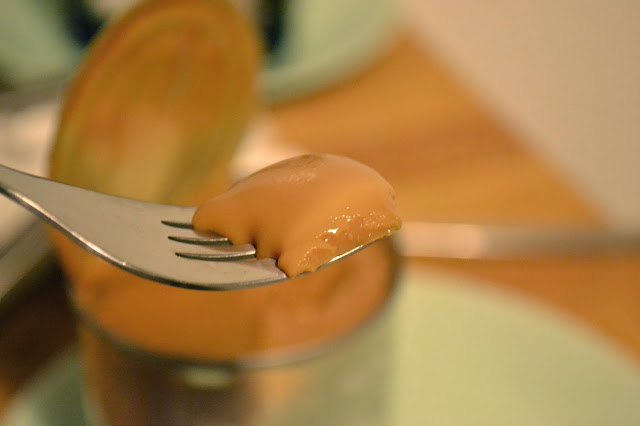
Dulce de leche is very popular in Argentina (yes, more popular than Maradona! Sticking my tongue out) as well as in many countries in America. It is sweet, not salty-sweet as caramel, but sweet-sweet, really sweet. Dulce de leche is so good that many people just eat spoons full of this milk jam. I rather use it for chocotorta (seriously, if you don´t know what chocotorta is, rank it first in your bucket list), Brownie cake and Havannet cake.
 
This recipe is a request from a friend and reader, Paulita, who´s living in Panamá and misses dulce de leche. But hey, wherever you are, you should really try it!!!! Have it with your favorite ice cream or use it as a cake filling, you won´t regret it!!!


INGREDIENTS:

A- Patience (ha! You really want to have this to get dulce de leche)
B- 1 can (or as many as you want) of sweetened condensed milk

PROCEDURE:

FIRST STEP: Pour water into a casserole and heat. 

SECOND STEP: Remove the paper from the can and place the can on the boiling water (check picture below). Cover the casserole.


THIRD STEP: Wait, and here comes the patience part. Yes, the third step is to wait for three hours. You can leave it an extra hour if you want a darker dulce de leche, I like it light colored.


FOURTH STEP: Turn off the heat and remove the can from the water. Allow them to cool a little bit.

FIFTH STEP: Once the can is at room temperature (you don´t want to get burned) you can open the can  and enjoy. You may want to place it in the fridge for a while.


Easy,  right? There is a longer way to make dulce de leche, but you will need more patience ha, ha, ha.


Next, Brownie cake recipe using dulce de leche!


Tuesday, December 10, 2013

Tiramisú Cake, an Italian Wonder


When well done, this is one of my favorites desserts. It looks like a really complicated dessert as it is so tasty, with so many flavors you can identify in your mouth: the ladyfingers, the brandy, the eggs, the coffee, the chocolate...

Every summer my mother in law buys these delicious mini Tiramisú cakes at the supermarket, so this recipe is dedicated to her, Teresa. And now, as I promised when I posted the Ladyfingers´ recipe, I bring you a dessert you can make with these vanilla sticks in case you want to surprise a friend, a family member or, as I´ll do, surprise my husband. 

INGREDIENTS:

A- Patience
B- 8oz of mascarpone cheese
C- 2 small egg yolks
D- 2 tablespoons of sugar
E- 2oz of espresso
F- 1 1/2 tablespoons of brandy or dark rum
G- 1-2 tablespoons of unsweetened cocoa powder
H- chocolate shavings for garnish.
I- Ladyfingers (I used about 10)

PROCEDURE:

FIRST STEP: Whisk the egg yolks, the sugar and half of the brandy. Put the machine in fast speed in order for the mixture to thicken. 


SECOND STEP: Now while at a normal speed, add the mascarpone cheese spoon by spoon. The texture will be soft, like mayonnaise. 


THIRD STEP: On a plate, mix the espresso and the remaining brandy. Wet the ladyfingers with this mixture. Make sure you make it fast, you want them slightly wet. Place them one after the other on a serving dish. I used 10 in total.


FOURTH STEP: Top the ladyfingers layer with 1/3 of the mascarpone mixture and repeat the ladyfinger layering.


FIFTH STEP: Top the ladyfingers again with the remaining cheese mixture.
SIXTH STEP: Cover and let it rest in the fridge for at least 4 hours. 
SEVENTH STEP:  Garnish with powdered cocoa and shaved chocolate.


Remember, if the mixture is too runny, you might want to use a pan instead of a serving dish.
Yield: 4 servings
Send pictures of your Tiramisú cake to cooknshoutenglish@gmail.com


Monday, December 9, 2013

Ladyfingers


How cool is to make your own ladyfingers?? I always though it would be hard, but I disliked the idea of sticking with the store ones that leave me a weird synthetic taste in my mouth. So one Sunday, back home in Argentina, I thought  "What if I try making them myself?". They didn´t look exactly as the ones you can find in stores, but they tasted so much better. This time I hope they look better and if they don´t, guess what??? I don´t care!!! I want them to make Tiramisú (recipe coming soon).

This recipe goes to my friend´s son, Benito. Benito.


INGREDIENTS:

A- Patience
B- 4 egg yolks
C- 4 egg whites
D- 100grs of sugar
E- 100grs of all purpose flour
F- 1 teaspoon of vanilla extract
G- Confectioner´s sugar.
H- Just a little bit of salt

PROCEDURE:

FIRST STEP:   Whisk the egg whites with the salt until they form hard peaks. You will be able to turn around the bowl on top of your head without the merengue falling to your face! Or, if you don´t want to take the risk, you will se that the merengue is hard on the whisker, it does not fall. Add 50 grams of sugar (half of it) and keep on whisking.


SECOND STEP: While you whisk the egg whites with your machine, in another bowl drop the egg yolks with the remaining sugar (50 grams) and the vanilla extract. If you don´t have to electrical whiskers, use a hand whisker or even a fork. Whisk until everything is well integrated.


THIRD STEP: Once you have your merengue and egg yolks mixture ready, pour  the yellow mixture into the merengue bowl and integrate with soft movements, always in the same direction.


FOURTH STEP: Sift the flour on top of the mixture while you keep on integrating the flour to the mixture with your spatula.


FIFTH STEP: Put the mixture into a pastry bag and make the ladyfingers by pressing on to a buttered pan. You can make the ladyfingers the size you wish.


SIXTH STEP: Sift the confectioners sugar on top of the raw ladyfingers.

SEVENTH STEP: Place them in the medium temperature pre-heated oven for 10 minutes and they are ready to go!


Wait for them to cool down a little bit before placing them on a cooling rack.


Mines taste great, what about yours? Send your pictures to cooknshoutenglish@gmail.com.


Tuesday, December 3, 2013

Homemade Ricotta...


In my stay in NYC, I tried different ricotta brands and, to be honest, I dislike them all. So I started searching for different recipes and well, I found it.  I´m going to share it with you and with my Hungarian neighbor, Adrienn. 

This ricotta taked, literally, 15 minutes from start to end and its so easy, you will never buy ricotta at the store again. It uses three ingredients and before you will notice, you will have an amazing ricotta at home to cook whatever you wish (I´ll post some ideas for you in the future). Now, the recipe
Ahora que tenemos el ingrediente podemos pasar a la receta.


INGREDIENTS:

A- Patience
B- 4 cups of whole milk
C- 1 cup of buttermilk
D- 1/3 cup of heavy cream

PROCEDURE: (I told you it was a piece of cake!)

FIRST STEP: In a large saucepan or casserole, add all the ingredients and take to the fire. There is no need to stir. In the meantime, extend a cheesecloth or dish-cloth on a bowl.


SECOND STEP: When the mixture starts boiling, you will notice the cheese will separate from the whey. It is then that we take the saucepan away from the stove.


THIRD STEP: Remove the white cheese from the saucepan and put it on the cheesecloth. When you are done, tie the cloth to the water faucet and let it drain for 5 minutes.


FOURTH STEPOpen the cheese-cloth and voilà! You have your homemade ricotta. You can add slt if you wish. It´s better to consume it that very day, but if you leave it for a couple of days in the fridge it will be fine, though not as fresh. 


Promise to post recipes with ricotta as an ingredient in the future. But in the meantime, what are you going to cook with this delicious ricotta?