Sunday, January 19, 2014

Quince Pastafrola


This quince pie is one of my favorites. It´s quite informal and usually served for tea, not as a dessert. My father taught me this recipe on my last trip to my home country, Argentina.  You can replace the quince with sweet potato jam, dulce de leche or any other jam that goes well with lemon flavored dough.


INGREDIENTS: For a 30cm cake pan

A- Patience
B- 500-600 grams of quince sweet
C- 120 grams of melted butter
D- 1 cup of regular sugar
E- 1 teaspoon of baking powder
F- 1 teaspoon of vanilla extract
G- Peel from one lemon
H- 1 egg
I- 1 egg yolk
J- 360 grams of all purpose flour
K- 1 pinch of salt

PROCEDURE:

FIRST STEP: Cut the sweet quince in cubes and place them on a bowl. We will later heat it in the microwave.


SECOND STEP: Melt butter in another bowl.


THIRD STEP: Add the sugar to the melted butter and stir with a fork until well integrated.


FOURTH STEP: Add the vanilla extract, baking powder and stir again.


FIFTH STEP: While stirring energetically add the lemon peel, egg and egg yolk.


SIXTH STEP: Finally, to conclude with the dough recipe, add the flour while stirring. Do not add the flour all at once. Eventually, you will have to use your hands.


SEVENTH STEP: Split the dough in two different sizes: one slightly bigger than the other one.
The bigger dough will be used for the base.

EIGHTH STEP: Place the bigger dough on the pan´s base and press it in order to cover the entire base.


NINTH STEP: Pour half a cup of water to the bowl with the quince and heat it until it boils in the microwave.

TENTH STEP: With a fork, press the quince until you obtain a  creamy texture.


ELEVENTH STEP: Pour the quince on top of the raw base dough and spread it to the borders, leaving a clean 1-1.5cm gap.


TWELFTH STEP: With the remaining doug make rounded strips and place them one 2.5-3cm away from the other on straight lines. When you covered the pan with the lines, place the other ones 90 degrees from the previous ones. Make sure to make a long strip to place on the circumference and press it with the fingers. Sounds tough but it´s not! Check pictures below.


THIRTEENTH STEP:  Bake on a preheated oven, medium temperature until the upper strips are golden color.


And there you have it, a delicious quince pastafrola!

Tuesday, January 14, 2014

Greek Curambiedes


I tried to get this recipe straight for a while. My Greek Yia yiá gave me the recipe before moving to New York, but no matter how many times I tried, the cookies turned out to be delicious but the consistency and shape wasn´t what I expect of Curambiedes. But then, of course, what she meant when  she said ´coffee plate size´ was an ultra-mini coffee plate (among other differences). So coming back to my home country, Argentina, I decided to have a grandmother-granddaughter day, spending the afternoon learning how to make the worldwide famous curambiedes. Satisfaction guaranteed or we´ll call the NASA for you, because if you don´t like curambiedes you are, for sure,... extraterrestrial!!!!! Hahahaha!

This recipe is dedicated to my friend Cheps and her family.


INGREDIENTS
A- Patience
B- 200 grams of salted butter
C- 340-350 grams of all-purpose flour
D- 1 egg
E- 50 grams of sugar
F- 1 teaspoon of vanilla extract
G- 1 teaspoon of baking powder
H- Confectioners sugar
I- Optional: Nuts or almonds

PROCEDURE:

FIRST STEP: Cut the butter in thin loafs and place them in the bowl where you´ll beat all the ingredients. The butter must be really tender, so either we wait for it to melt a little bit or we heat it using the bain-marie method. Warning: don´t melt the butter thoroughly, just soften it so it is easy to beat.


SECOND STEP: Beat the butter until it has whiten and start adding the regular sugar.


THIRD STEP: Take the beater away for this step and make sure your hands are clean. Mix the already mixed ingredients a little bit more with your fingers. It sounds crazy, yes, but that´s the way my Yia yiá taught me to do it.


FOURTH STEP: Add the egg yolk, but leave a little bit of the egg white too. 

FIFTH STEP: Add the vanilla extract and beat once again (with the beater). 

SIXTH STEP: Stiff the flour and baking powder into the mixture and knead as if you were scratching the mixture, like when you make a hole in the sand with your hands. Do not add the flour all at once.


SEVENTH STEP: Once the flour has been thoroughly integrated you can start giving shape to the cookies. TIP: Place them in a teflon baking pan and put that pan over a clean one so the cookies don´t get burned. 

Preheat oven to middle temperature.

To shape the cookies, grab a small piece of dough and press it with your hand, between your palm and your fingers. You can cut off the dough exceeding your hand so that all the cookies have the same size. You will see the shape is not uniform because of the gaps between finger and finger: roll the dough slightly with the help of your other hand, curve it a little bit and place it on the cookie pan.

You can make them round if you want and even place a nut or an almond inside of the cookie.


EIGHTH STEP: Bake the cookies for about 20 minutes. You´ll realize that they are ready because they look gold color on the bottom and they are dry on the top.

NINTH STEP: Let them cool, but not entirely, just so that you can touch them without burning your fingers. 

TENTH STEP: In a small dish place the confectioners sugar and sprinkle the cookie. You can do this with a sifter as well.

ELEVENTH STEP: Place the cookies on a serving plate or in a tupper, they last a month in a fresh and dry place, though I bet they won´t last a month…they are so delicious!


Now tell us, are you extraterrestrial?


Monday, December 16, 2013

Homemade Dulce De Leche


Dulce de leche is very popular in Argentina (yes, more popular than Maradona! Sticking my tongue out) as well as in many countries in America. It is sweet, not salty-sweet as caramel, but sweet-sweet, really sweet. Dulce de leche is so good that many people just eat spoons full of this milk jam. I rather use it for chocotorta (seriously, if you don´t know what chocotorta is, rank it first in your bucket list), Brownie cake and Havannet cake.
 
This recipe is a request from a friend and reader, Paulita, who´s living in Panamá and misses dulce de leche. But hey, wherever you are, you should really try it!!!! Have it with your favorite ice cream or use it as a cake filling, you won´t regret it!!!


INGREDIENTS:

A- Patience (ha! You really want to have this to get dulce de leche)
B- 1 can (or as many as you want) of sweetened condensed milk

PROCEDURE:

FIRST STEP: Pour water into a casserole and heat. 

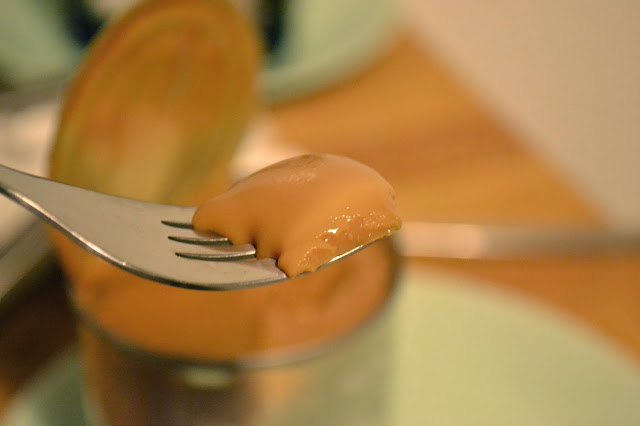
SECOND STEP: Remove the paper from the can and place the can on the boiling water (check picture below). Cover the casserole.


THIRD STEP: Wait, and here comes the patience part. Yes, the third step is to wait for three hours. You can leave it an extra hour if you want a darker dulce de leche, I like it light colored.


FOURTH STEP: Turn off the heat and remove the can from the water. Allow them to cool a little bit.

FIFTH STEP: Once the can is at room temperature (you don´t want to get burned) you can open the can  and enjoy. You may want to place it in the fridge for a while.


Easy,  right? There is a longer way to make dulce de leche, but you will need more patience ha, ha, ha.


Next, Brownie cake recipe using dulce de leche!


Tuesday, December 10, 2013

Tiramisú Cake, an Italian Wonder


When well done, this is one of my favorites desserts. It looks like a really complicated dessert as it is so tasty, with so many flavors you can identify in your mouth: the ladyfingers, the brandy, the eggs, the coffee, the chocolate...

Every summer my mother in law buys these delicious mini Tiramisú cakes at the supermarket, so this recipe is dedicated to her, Teresa. And now, as I promised when I posted the Ladyfingers´ recipe, I bring you a dessert you can make with these vanilla sticks in case you want to surprise a friend, a family member or, as I´ll do, surprise my husband. 

INGREDIENTS:

A- Patience
B- 8oz of mascarpone cheese
C- 2 small egg yolks
D- 2 tablespoons of sugar
E- 2oz of espresso
F- 1 1/2 tablespoons of brandy or dark rum
G- 1-2 tablespoons of unsweetened cocoa powder
H- chocolate shavings for garnish.
I- Ladyfingers (I used about 10)

PROCEDURE:

FIRST STEP: Whisk the egg yolks, the sugar and half of the brandy. Put the machine in fast speed in order for the mixture to thicken. 


SECOND STEP: Now while at a normal speed, add the mascarpone cheese spoon by spoon. The texture will be soft, like mayonnaise. 


THIRD STEP: On a plate, mix the espresso and the remaining brandy. Wet the ladyfingers with this mixture. Make sure you make it fast, you want them slightly wet. Place them one after the other on a serving dish. I used 10 in total.


FOURTH STEP: Top the ladyfingers layer with 1/3 of the mascarpone mixture and repeat the ladyfinger layering.


FIFTH STEP: Top the ladyfingers again with the remaining cheese mixture.
SIXTH STEP: Cover and let it rest in the fridge for at least 4 hours. 
SEVENTH STEP:  Garnish with powdered cocoa and shaved chocolate.


Remember, if the mixture is too runny, you might want to use a pan instead of a serving dish.
Yield: 4 servings
Send pictures of your Tiramisú cake to cooknshoutenglish@gmail.com


Monday, December 9, 2013

Ladyfingers


How cool is to make your own ladyfingers?? I always though it would be hard, but I disliked the idea of sticking with the store ones that leave me a weird synthetic taste in my mouth. So one Sunday, back home in Argentina, I thought  "What if I try making them myself?". They didn´t look exactly as the ones you can find in stores, but they tasted so much better. This time I hope they look better and if they don´t, guess what??? I don´t care!!! I want them to make Tiramisú (recipe coming soon).

This recipe goes to my friend´s son, Benito. Benito.


INGREDIENTS:

A- Patience
B- 4 egg yolks
C- 4 egg whites
D- 100grs of sugar
E- 100grs of all purpose flour
F- 1 teaspoon of vanilla extract
G- Confectioner´s sugar.
H- Just a little bit of salt

PROCEDURE:

FIRST STEP:   Whisk the egg whites with the salt until they form hard peaks. You will be able to turn around the bowl on top of your head without the merengue falling to your face! Or, if you don´t want to take the risk, you will se that the merengue is hard on the whisker, it does not fall. Add 50 grams of sugar (half of it) and keep on whisking.


SECOND STEP: While you whisk the egg whites with your machine, in another bowl drop the egg yolks with the remaining sugar (50 grams) and the vanilla extract. If you don´t have to electrical whiskers, use a hand whisker or even a fork. Whisk until everything is well integrated.


THIRD STEP: Once you have your merengue and egg yolks mixture ready, pour  the yellow mixture into the merengue bowl and integrate with soft movements, always in the same direction.


FOURTH STEP: Sift the flour on top of the mixture while you keep on integrating the flour to the mixture with your spatula.


FIFTH STEP: Put the mixture into a pastry bag and make the ladyfingers by pressing on to a buttered pan. You can make the ladyfingers the size you wish.


SIXTH STEP: Sift the confectioners sugar on top of the raw ladyfingers.

SEVENTH STEP: Place them in the medium temperature pre-heated oven for 10 minutes and they are ready to go!


Wait for them to cool down a little bit before placing them on a cooling rack.


Mines taste great, what about yours? Send your pictures to cooknshoutenglish@gmail.com.